
Multi-Panels
Multi-panels combine two or more ticket panels into a single embed message. Instead of posting each panel separately, you can present all of your ticket types in one place, either as a row of buttons or as a dropdown menu.
You need at least two existing panels before you can create a multi-panel. If you have not created any panels yet, follow the Panels guide first.
Creating a Multi-Panel
Open the dashboard, select your server, and click Panels in the sidebar. The Multi-Panels section is on the right side of the page. Click Create Multi-Panel to open the editor.
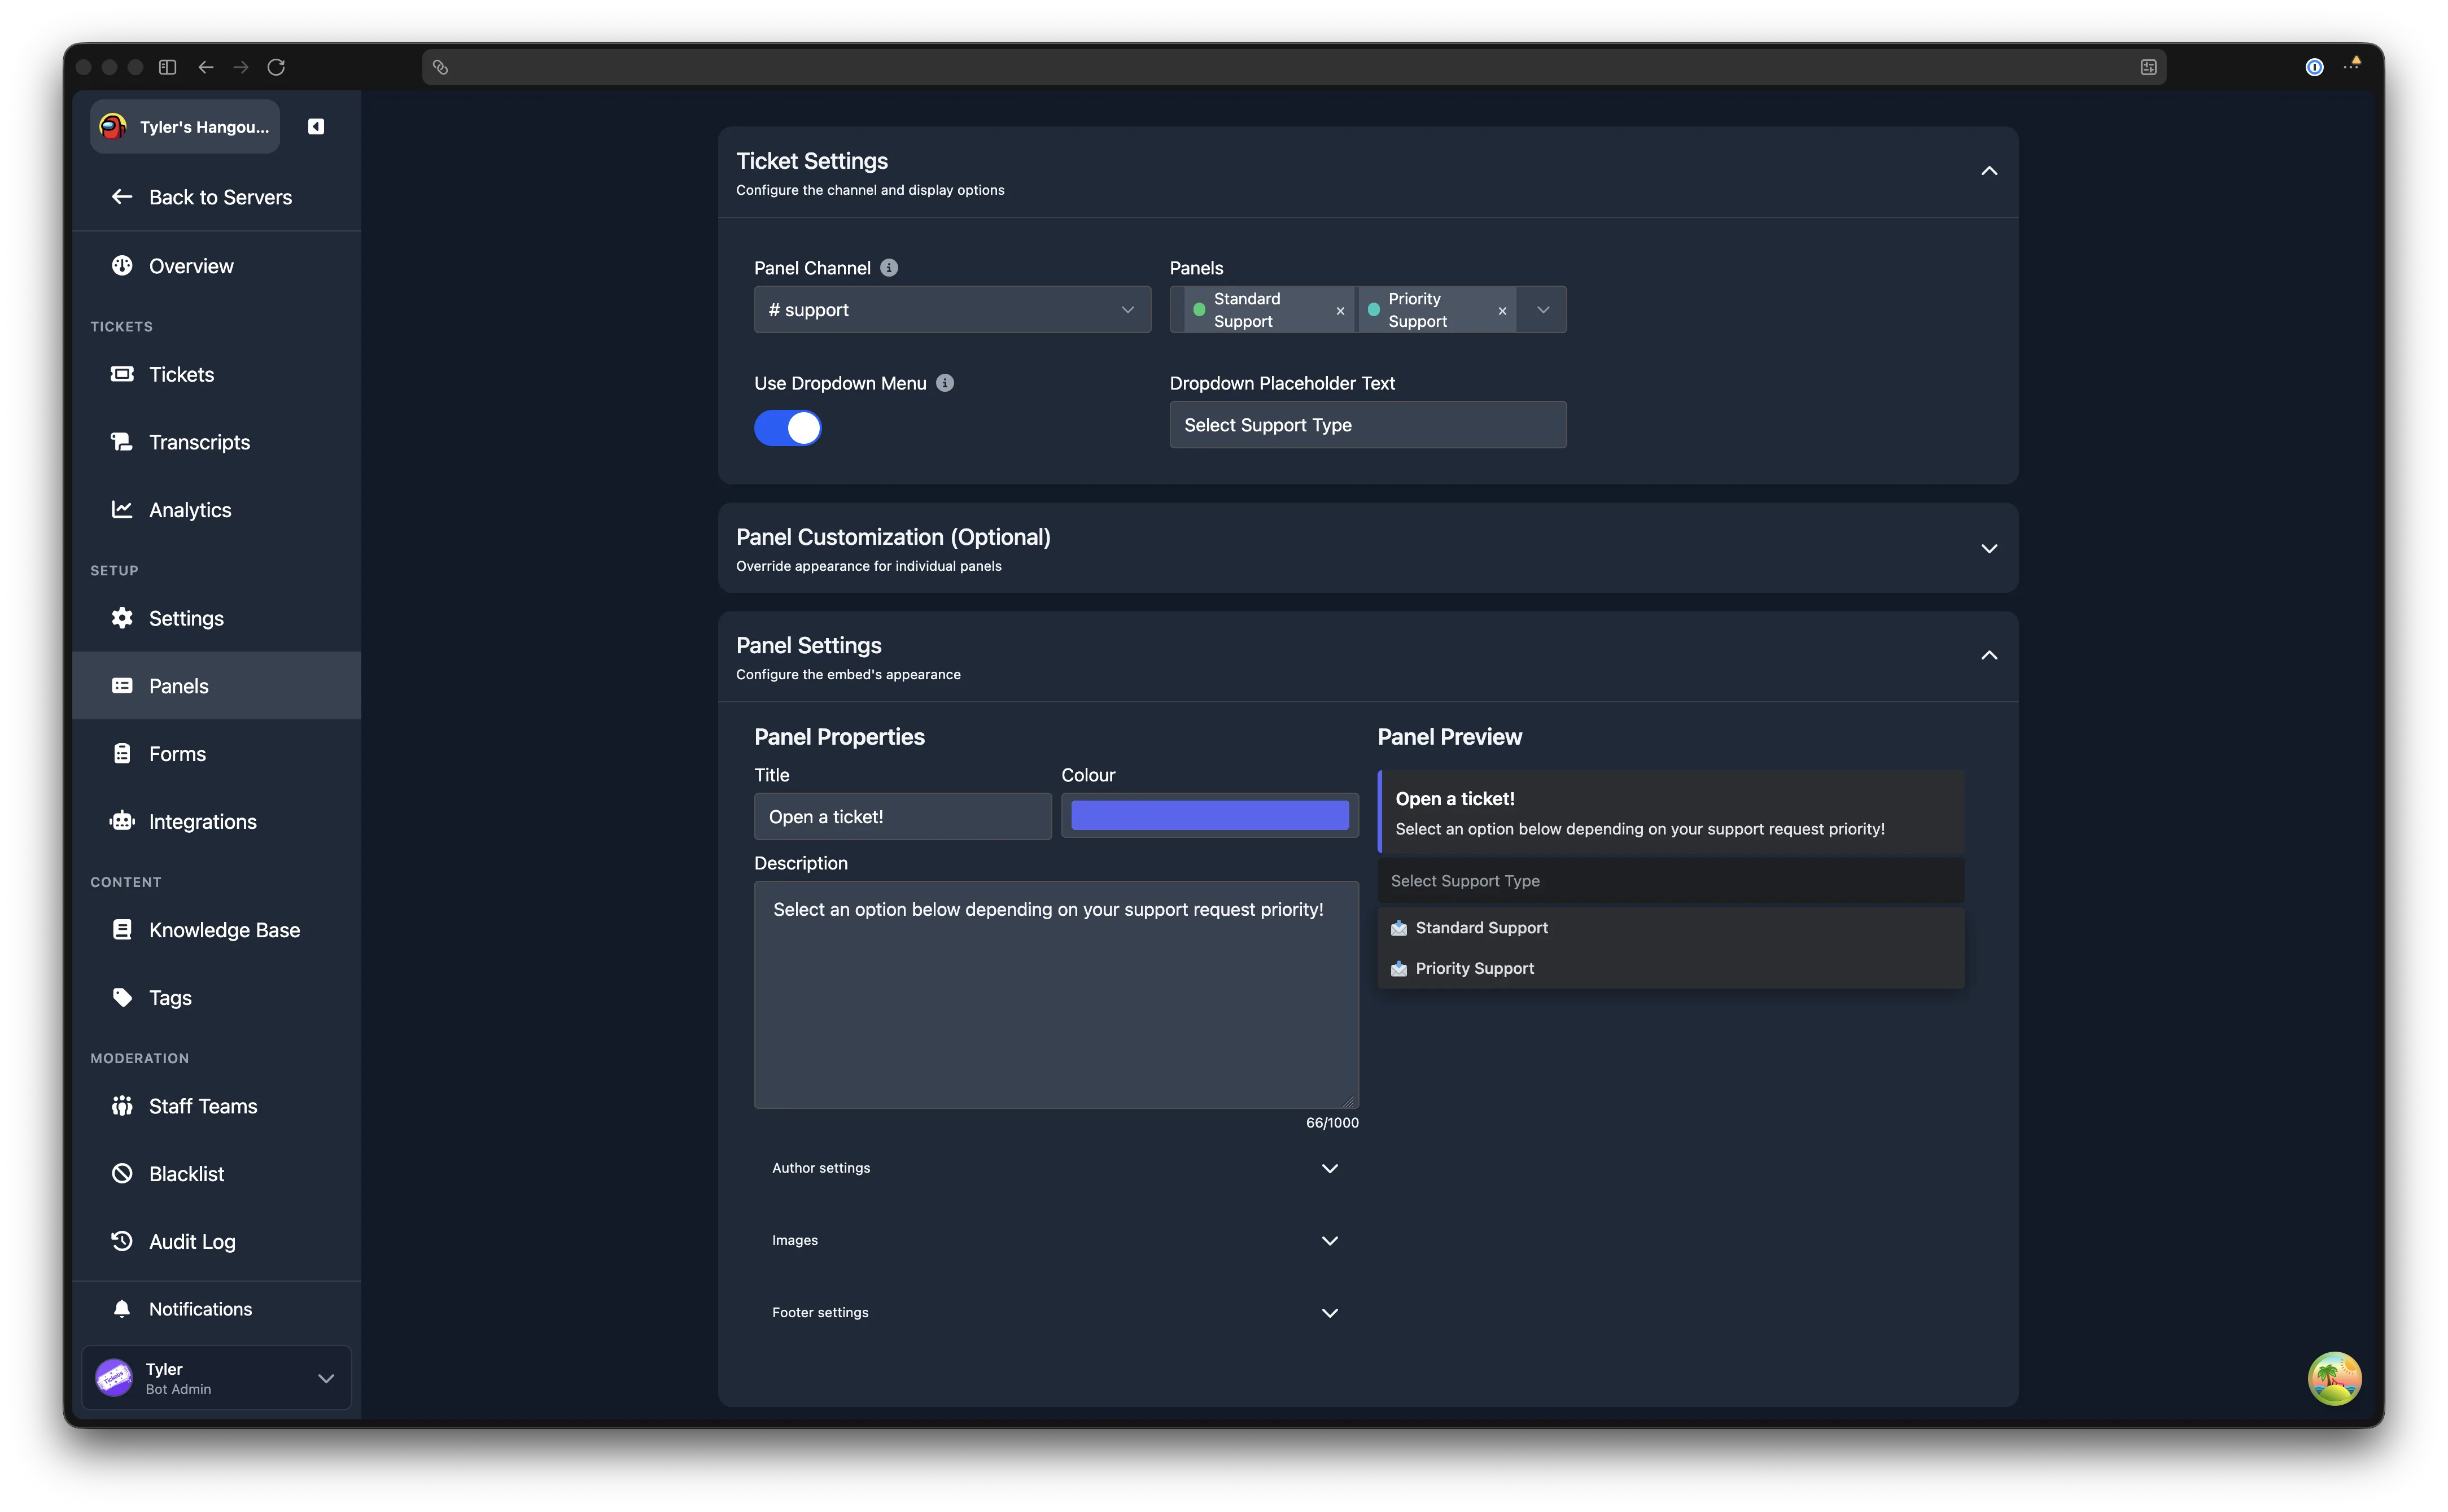
The editor is divided into three sections described below. After configuring the multi-panel, click Create Multi Panel at the bottom of the page.
Editing a Multi-Panel
From the Panels page, click the action menu on any multi-panel row and select Edit. The same editor opens with the multi-panel's current settings. After making changes, click Save Changes.
To resend a multi-panel (for example, if the message was deleted in Discord), click Resend in the action menu. To delete a multi-panel, click Remove. Deleting the message in Discord does not remove the multi-panel from the dashboard; you can resend it at any time.
Ticket Settings
Controls which panels are included and how they are presented.
Panel Channel
The Discord text channel where the bot sends the multi-panel embed. This should be a channel accessible to all members.
Use a Separate Channel
Do not use the same channel as your transcript channel.
Panels
Select the individual panels to include in this multi-panel. Each panel must already exist. You must select at least 2 and can include up to 15.
Use Dropdown Menu
Toggle between two display modes:
- Enabled - the panels appear as a dropdown select menu beneath the embed. Each panel must have a label (either its own button text or a custom label set in the Panel Customization section).
- Disabled - the panels appear as individual buttons beneath the embed.
Click the info icon next to the toggle for a visual comparison of both modes.
Dropdown Placeholder Text
Only available when the dropdown menu is enabled. Sets the placeholder text shown in the dropdown before the user makes a selection (e.g. "Select a category").
Panel Customization (Optional)
Override the appearance of individual panels within this multi-panel. Each panel you selected in the Ticket Settings section appears as a card with the following fields:
Custom Emoji
Override the emoji shown on this panel's button (or in the dropdown). Leave empty to use the panel's default emoji.
Custom Label
Override the text label shown on this panel's button (or in the dropdown). Leave empty to use the panel's default button text.
Dropdown Mode Requires Labels
When using dropdown mode, every panel must have a label. If a panel has neither a custom label here nor a button text on the panel itself, the editor will show an error and prevent you from saving.
Description
Only available when dropdown mode is enabled. An optional short description shown beneath the panel's label in the dropdown menu.
Panel Settings
Controls the appearance of the multi-panel embed itself. A live preview is shown on the right side of the editor.
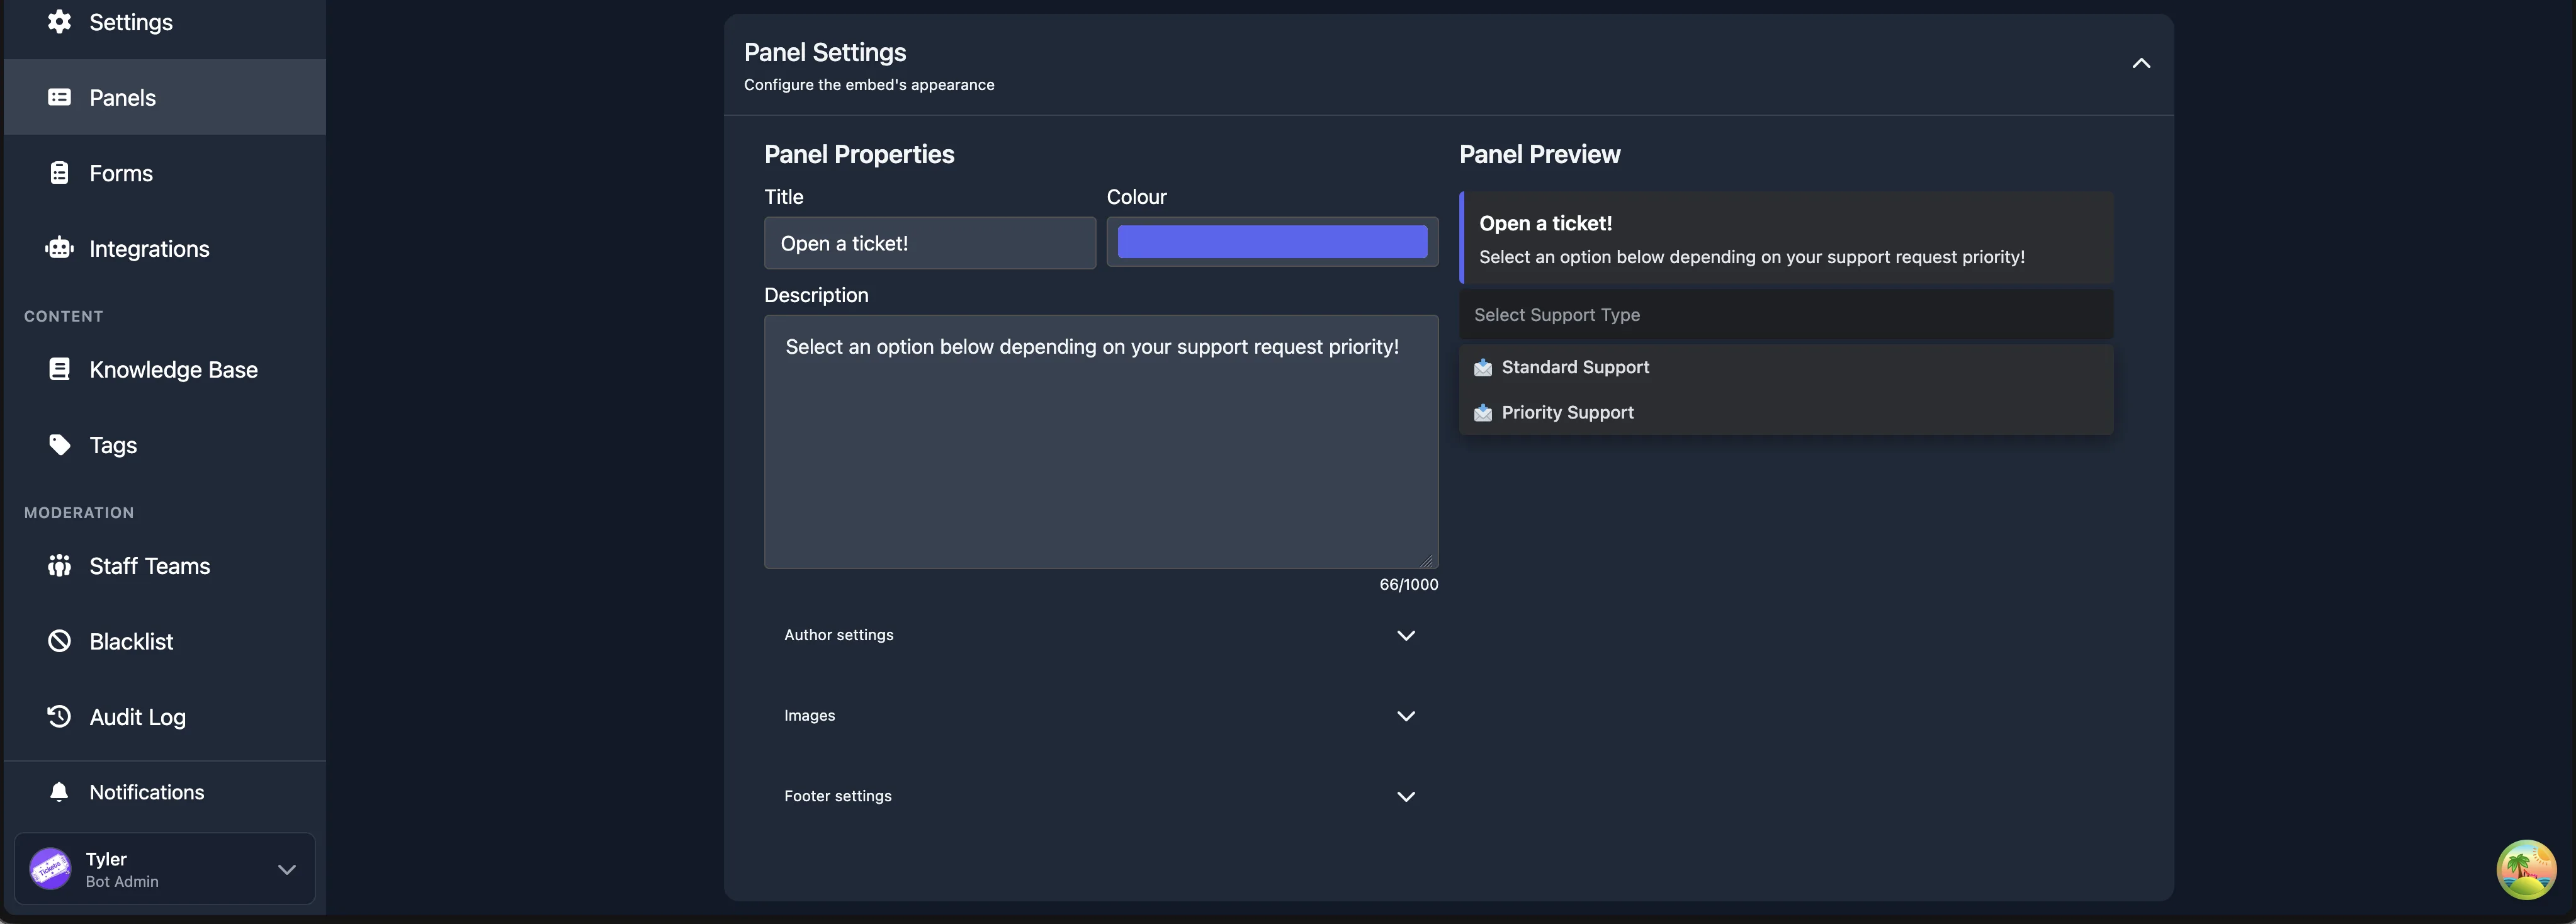
Title
The bold text at the top of the embed.
Colour
The accent colour on the left edge of the embed. Click the colour picker to choose a custom colour.
Description
The main body text of the embed. Maximum length: 1,000 characters.
Author Settings
An expandable sub-section with fields for:
- Author Name - text displayed above the embed title.
- Author Icon URL - a small image displayed next to the author name.
- Author URL - a link that the author name points to when clicked.
Images
An expandable sub-section with fields for:
- Thumbnail URL - a small image shown to the right of the embed content.
- Image URL - a large image shown below the embed content.
Image URLs
The URL should point directly to an image file. An easy way to get a suitable URL is to send the image as a message in a Discord channel, then right-click the image and choose Copy Link.
Footer Settings
An expandable sub-section with fields for:
- Footer Text - text displayed at the bottom of the embed.
- Footer Icon URL - a small image displayed next to the footer text.
- Footer Timestamp (Optional) - a date and time displayed next to the footer.